| HTML Tags | Example | |
|---|---|---|
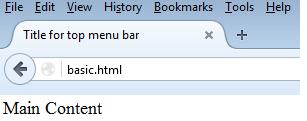
<html> <head> <title>Title for top menu bar </title> </head> <body> Main Content </body> |
|
| HTML Tags | Example | |
|---|---|---|
| <h1>Header one</h1> | Header one | |
| <h2>Header Two</h2> | Header Two | |
| <h3>Header Three</h3> | Header Three | |
| <h4>Header Four</h4> | Header Four | |
| <h5>Header Five</h5> | Header Five | |
| <h6>Header Six</h6>> | Header Six | |
| Normal size text | Normal size text | |
| <u>Underlined Text</u> | Underlined Text | |
| <b>Text that is Bold</b> and text that is not bold | Text that is Bold and text that is not bold | |
| <i>Text is italics </i> | Text is italics | |
| A hard rule <hr> is a horizontal line | A hard rule is a horizontal line |
| HTML Tags | Example | |
|---|---|---|
|
<font color="red">This text will be red</font> or may be specified using a tripple of rgb hex-pairs to specify an amount of red, green, and blue. <font color="#5566AA">This as "55" red, "66" green, and "AA" blue </font> |
This text will be red or may be specified using a tripple of rgb hex-pairs to specify an amount of red, green, and blue. This as "55" red, "66" green, and "AA" blue |
The font tag can also be used to set size of the font, either to a more absolute pt size or a size relative to the default point size.
| HTML Tags | Example | |
|---|---|---|
|
This is a normal size font and this
<font size=+2> text is +2 bigger</font> |
This is a normal size font and this
text is +2 bigger |
This is a normal size font and this
<font size=-2> text is -2 smaller</font> |
This is a normal size font and this
text is -2 smaller |
The font tag has additional options; once you reach a certain point with HTML development you will want to use style sheets instead of many of the html tags.
| HTML Tags | Example | ||
|---|---|---|---|
|
<table border=1> <tr><td>Row one, column 1</td> <td>Row one, column 2</td> </tr> </table> |
|
Table headers can be specified using <th> and </th> tags instead of <td> and </td> tags. Generaly the text between the <th> and </th> tags will be displayed as bold and centered. This is an example of a two-row, three-column table using table headings.
| HTML Tags | Example | |||||||||
|---|---|---|---|---|---|---|---|---|---|---|
|
<table border=1> <tr><th>Heading for Column 1</th> <th>Heading for Column 2</th> <th>Heading for Column 3<</th> </tr> <td>Data col three</td> </tr> <td>More data col three</td> </tr> </table> |
|
There are additional table options, such as setting a table to have no border: <table border=0> or a thicker border <table border=4>.
Columns can be combined using the colspan=2 option, as shown below:
| HTML Tags | Example | |||||||||
|---|---|---|---|---|---|---|---|---|---|---|
|
<table border=1> <tr><th>Heading for Column 1</th> <th>Heading for Column 2 </th> <th>Heading for Column 3 </th> </tr> <tr><td>Data col one</td> <td colspan=2>Data col two spanning into col 3 </td> </tr> <tr> td>More data col one</td> <td>More data col two</td> <td>More data col three</td> </tr> </table> |
| |||||||||
Cells between rows can be combined using the rowspan option as shown below:
| HTML Tags | Example | ||||||||
|---|---|---|---|---|---|---|---|---|---|
|
<table border=1> <tr><th>Heading for Column 1</th> <th>Heading for Column 2</th> <th>Heading for Column 3</th> </tr> <tr><td rowspan=2>Data col one spanning into the next row.</td> <td>Data col two</td> <td>Data col three</td> </tr> <tr><td>More data col two</td> <td>More data col three</td> </tr> </table> |
|
| HTML Tags | Example | |
|---|---|---|
|
<ul>Unordered List <li><b>item 1</b>: description 1 <li><b>item 2</b>: description 2 <li><b>item 3</b>: description 3 <li><b>item 4</b>: description 4 <li><b>item 5</b>: description 5 </ul> |
|
| HTML Tags | Example | |
|---|---|---|
|
<ul>Ordered List <li><b>item 1</b>: description 1 <li><b>item 2</b>: description 2 <li><b>item 3</b>: description 3 <li><b>item 4</b>: description 4 <li><b>item 5</b>: description 5 </ol> |
|
| HTML Tags | Example | |
|---|---|---|
|
Sample HTML Form <h2>Order your free School T-Shirt</h2> <form action="/IBCS/T2/HTML/prog0.php" method="post"> <p><strong>Name:</strong><br> <input type="text" name="user"></p> <p><strong>Enter Shipping Information:</strong><br> <textarea name="message" rows="5" cols="48" ></textarea> </p> Shirt Size:<br> <input type=radio name=size value="s">Small <input type=radio name=size value="m">Medium <input type=radio name=size value="l" checked>Large <input type=radio name=size value="xl">XL <p> Additional Items with Mascot:<br> <input type=checkbox name=pens value="yepper">Pens (2) <input type=checkbox name=folder checked>Two-pocket Folder <br> <p></p>Shirt Color <select name=color> <option value="White">White</option> <option value="blue">Blue</option> <option value="black">Black</option> </select><p> <p> Select additional options<br> <select name=otherCar[] multiple size=4> <option value="mono">Monogrammed Front</option> <option value="name">Last Name on Back</option> <option value="strip">Black Stipe on Sleves</option> <option value="hood">Hood</option> <option value="vneck">V-neck</option> </select> <br> <input type="submit" value="Submit"> </form> |
Sample HTML Form
Order your free School T-Shirt |